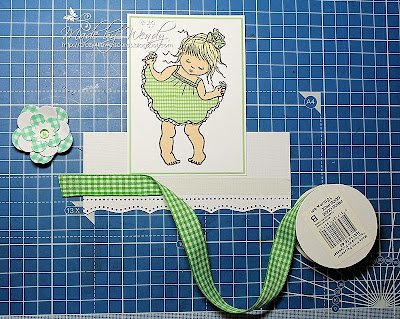
Good morning all....It's my turn to post a tutorial for the Joanna Sheen Challenge blog today, this is not something I have done before and took me many hours to work out what to do but decided in the end to go with Pleated Ribbon.
***************************
Hiya...It's Wendy here with my first tutorial Pleated Ribbons, feeling a little nervous, so be kind....
I am going to share with you how I pleated my ribbon on this card which I made for our last challenge Ribbons.
You will need
Card /Paper or whatever you want to pleat your ribbon onto
Ribbon
Double sided tape
Glue Dots
1. Start by adding a strip of double sided tape on your project where you want your ribbon to go. I have use the red Super Sticky tape...make sure the tape goes end to end or even wrap around the sides to help hold the ribbon on the back.
2. Before starting to pleat my ribbon I left enough straight which is where I fixed my flower later... a bow would look too. I left my ribbon on the spool so I didn't cut of too much or to little.
3. Then I begun folding the ribbon and tacking down it down in place changing the directions of the folds to give different pleats...You could do the folds straight and of even lengths if you wish. When I reached the end I cut the ribbon from the spool leaving a little to wrap behind my card and fix with some tape.
4. Then I added glue dots to the peaks of ribbon to hold them down and fixed my flower to the part I left straight.
And here's my finished card, love the texture this pleated ribbon technique creates.
This little cutie is Maisy from the fabulous Daisy & Friends CD ROM, the gingham backing paper is also from the CD ROM...There are so many adorable images/papers and so much more on this CD ROM and really great value at £9.99 and free postage and packing on all orders over £9 at Joanna Sheen.
Hope you have enjoyed my tutorial, would love to know what you think. It would be great to see your pleated ribbons and how you do it, why not join in our challenge this fortnight Coffee and Cream...Don't forget that if you want to be in with a chance of winning the £15 Random prize you must use a Joanna Sheen product in your project...Good luck.
Thanks for stopping by
Hugs
Thanks for stopping by
Hugs


21 comments:
Awesome card, Wendy...perfect tutorial...will give it a try!
xxx Margreet
Gorgeous card Wendy, love the image and that beautiful pleated ribbon. Thanks for sharing how you achieved it.
Hugs
caz x
This is something I very seldom have done but I will try again, your card is gorgeous. xxx
Your tutorial is fabulous Wendy, it's so clear and easy to understand.
hugs Sue xx
Gorgeous card Wendy and fab tutorial.
Thank you.
Hugs
Cathy
xxxxx
Gorgeous card Wendy! I love the pleated ribbon. Thanks for sharing a tutorial on it.
Please join me for a chance to win FREE candy on my blog. Have a wonderful week! Hope to see you again next week. Hugs, Gloria
http://purpleglocreations.blogspot.com
OMGosh, this card is sooo cute! Beautiful image and the tutorial is fabulous too!
Fabulous card, love the ribbon treatment and the colours are gorgeous
Lindsay xx
Gorgeous and beautiful card Wendy and fab tutorial too thank you for popping by my blog and leaving me wonderful comments and best wishes
Hugs Dianne xx :)
Oooo what a great tutorial and i'm going to give it a go, Luv Sam x
Just gorgeous,love the image.Fab tutorialxxx
Your pleated ribbon looks fabulous Wendy - as does your card! Susan x
Gorgeous card Wendy - adorable image and your ribbon pleating is fabulous - super tutorial :o)
Debs xx
wonderful Wendy and a great tutorial too
Hugs Kate xx
so gorgeous wendy.i love the gingham and stunning pleated ribbon and image :D
xx coops xx
adorable card Wendy, love this sweet image.
thank you for a lovely tutorial.
pam
Gorgeous card Wendy, great tutorial too thank you.
kevin xx
Fabulous paper piecing Wendy... gorgeous card - love it!
Hugs
Christine x
A great tutorial Wendy. Thanks for sharing.
Mags
x
Wendy beautiful card love the ribbon makes it more special. Thanks for the tutorial will have to have a go. Love Alison xx
Beautiful card Wendy and thank you for the tutorial it's very clear xx
Post a Comment